Here’s a step-by-step guide for managing DNS at AWS Route 53 with a newly registered domain in Godaddy. You can perform similar steps if you registered a domain at any other registrar. The below steps are based on a domain registered at GoDaddy
Step 1: Log in to your AWS account
Log in to your AWS account and navigate to the Route53 Service Dashboard.
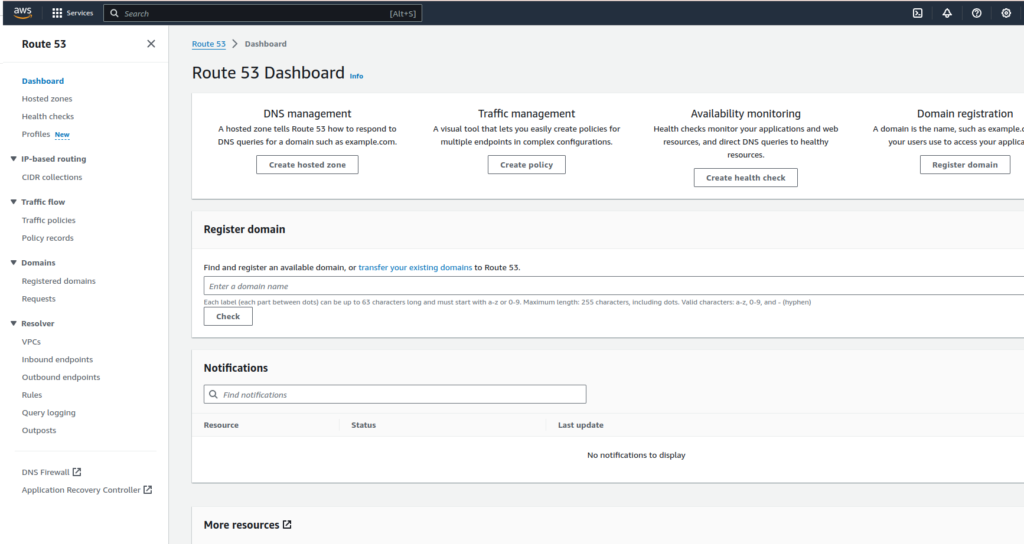
Click on the ‘Create Hosted Zone’ DNS management option and fill in the information.
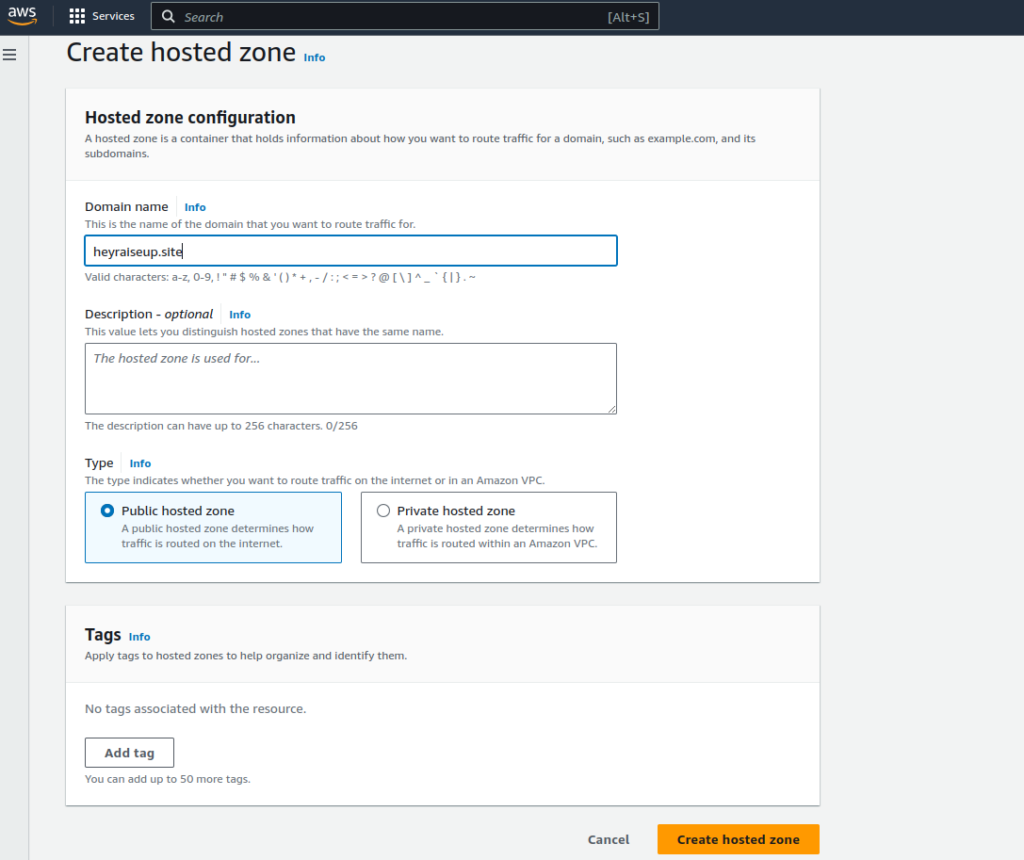
Once you click on Create hosted zone, you will have a public hosted on for your domain and you can see the NS records while getting into the hosted zone page. Note down the NS records.
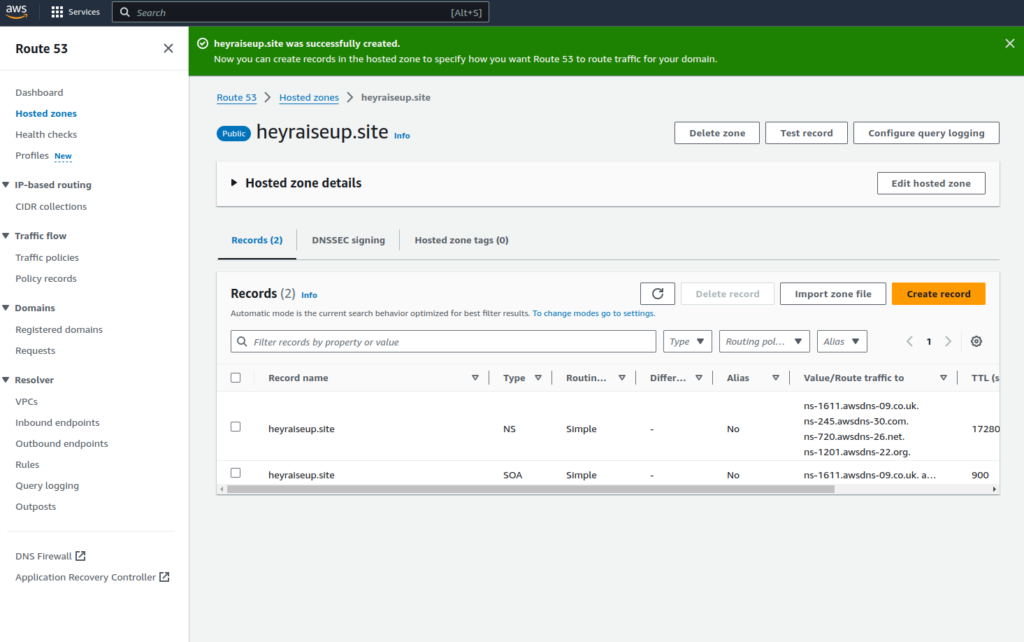
Here the NS records are,
ns-1611.awsdns-09.co.uk.
ns-245.awsdns-30.com.
ns-720.awsdns-26.net.
ns-1201.awsdns-22.org.
Step 2: Log in to your Godaddy account and Update DNS
Log in to your Godaddy account go to Domains, select your domain, and navigate to DNS-NameServers. Click on Change Name servers
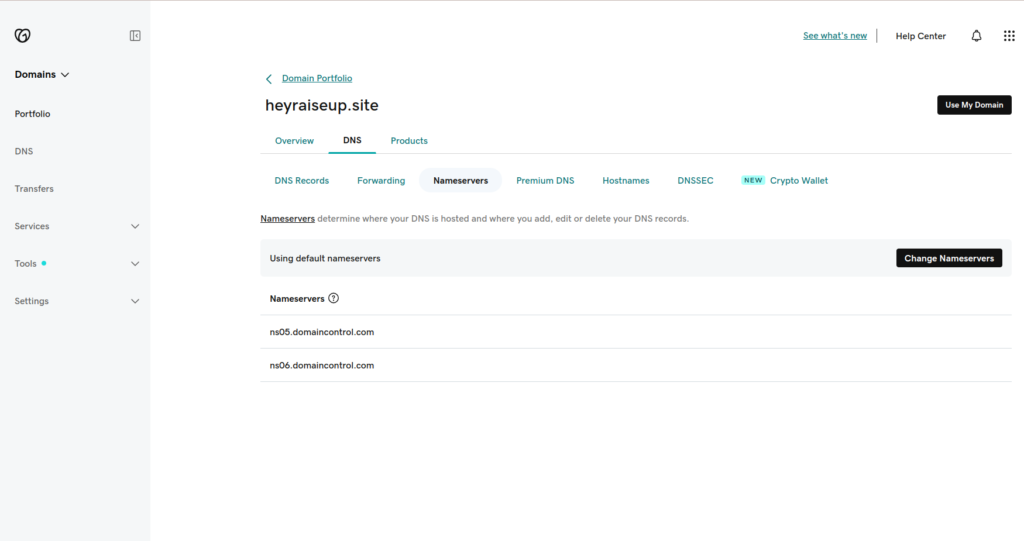
You will have the option to use “I’ll use my own nameservers” and click on that option, to add the NS records we previously noted.
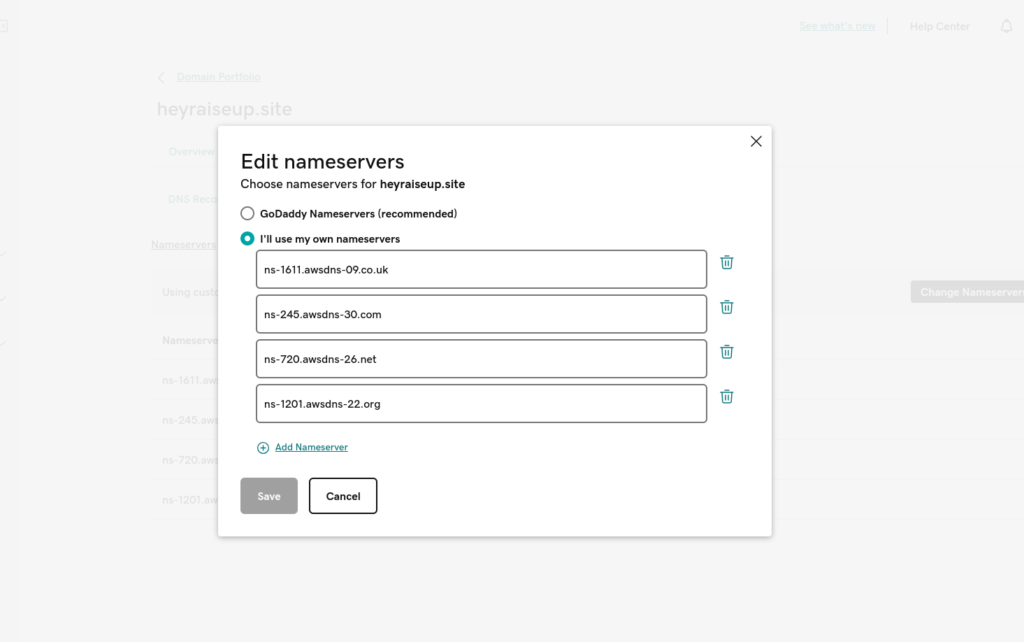
Once you updated, wait for DNS propagation (A couple of minutes to 48 hours) and try to visit https://intodns.com/ or perform the below command in your terminal to verify that NS records are updated properly.

Conclusion
Now you can manage the other DNS records at Route53 and tightly integrate with other Amazon Services. Please feel free to read for a quick understanding of domain name and DNS .


